Wednesday, May 30, 2012

How to Read a File Line By Line in Shell Script(Bash) and Process Each Line in The Loop

Bash/Shell Script to Read  A File Line By Line 

I found a lot of different ways to read the file line by line in shell script.
Also I had a hard time to process the line read inside the loop.

Thought of documenting the solution so that others don't have to go through the frustration I did.

Here it goes...

#Code to Read a File Fine by Line In Shell Script(bash)
#AND
#Process Line in the the loop

while read line
do
 current_line=$(echo $line)
 modified_line="Hi "$current_line
 echo $modified_line
done < file_You_Want_To_READ.txt

Explanation:
  • Here file_You_Want_To_READ.txt is the file present in the same directory as your script. This is the file you want to process line by line.
  • The loop stores each line in a variable called line
  • If I want to process that variable line, then it has to be stored in another variable,current_line by using $(echo $line)
  • Then I create another variable modified_line that'll just prepend "Hi" to it. Then I just print it.
If the file file_You_Want_To_READ.txt looks like this:
Abhi
Nandan

Then the output will be :
Hi Abhi
Hi Nandan

How To create directories folders recursively in linux?

We all know about the mkdir command in linux that lets us creates directories.

But we will end up having many occassions where we will have to create directories or folders deeply nested.

Say we want to create /directory_1/directory_2/directory_3 where none of the directories are existing. How do we do it?

Simple...Just add -p option.

$ mkdir -p /directory_1/directory_2/directory_3


How to execute commands in Java?

Lets see some Java Code For Executing A Command usually executed on a shell or a command line


Okay? "Why will I ever run a command in java?" you ask?

It so happens that you will end up having to connect to a remote machine and execute some command there and checking its output.

Also, sometimes it is far easier to use the inbuilt commands to do hardcore text processing.

Now onto the code. In this example we will run the jar command to display the contents of the jar-file jmockit.jar.

public class JARDisplay {

 public static void main(String[] args) throws IOException {

  //the jar whose contents we want to display
  String PATH_TO_JAR_FILE = "C:\\jmockit.jar"; 
  
  //Execute the command, jar tvf C:\jmockit.jar
  Process p = Runtime.getRuntime().exec("jar tvf " + PATH_TO_JAR_FILE);

  // read the command output from the process's input stream. 
  BufferedReader commandOutputReader = new BufferedReader(new InputStreamReader(p.getInputStream()));
  String op = null;

  //Display the output of the command line by line
  while ((op = commandOutputReader.readLine()) != null) {
   System.out.println(op);

  }
 }
}

The following is  the output when I run the above program in eclipse: 


But what happens if I goof up the command and give a wrong file name?
say jmit.jar ?

 On the prompt, this is what it shows


Then the above program would run and display nothing on the  java console. How would we get the same output as we got in the image above?

Just as we read the InputStream for the returned Process, we need to read the ErrorStream . Look at the code below to understand the changes.


public class JARDisplay {

 public static void main(String[] args) throws IOException {
  //the jar whose contents we want to display
  String PATH_TO_JAR_FILE = "C:\\jmit.jar"; 
  
  //Execute the command, jar tvf C:\jmockit.jar
  Process p = Runtime.getRuntime().exec("jar tvf " + PATH_TO_JAR_FILE);

  // read the command output from the process's input stream. 
  BufferedReader commandOutputReader = new BufferedReader(new InputStreamReader(p.getInputStream()));
  String op = null;
  //Display the output of the command line by line
  
  while ((op = commandOutputReader.readLine()) != null) {
   System.out.println(op);
  }
  //Check the Error Stream for errors
  BufferedReader stdError = new BufferedReader(new InputStreamReader(
    p.getErrorStream()));

  // read any errors from the attempted command
  while ((op= stdError.readLine()) != null)
   System.out.println(op);
  
 }

}

And now for the output on the eclipse java console..


Its the same error text what we got on the prompt..

Thats it for now! Hope you enjoyed the tutorial.

Please leave comments. Your words will encourage me to write more of these...

Monday, May 28, 2012

How to log out of Stumble Upon in Chrome?


Have you noticed how everything about the new stumble upon sucks?

Apart from the logo that looks some thing like a middle finger and also like a.. uh... ,well I'll leave it to you to figure out and the inability to look at all the topics for adding our interests, one of the most annoying non-feature is unavailability of a log-out link in the tool bar thingy that comes in chrome.

After a lot of heckling I found out how to log out of it to stop it stalking me as I browse.
This is how you have to log out.......... DO BOTH OF THEM!

A. Logging out of Stumble Upon in the browser

Type http://www.stumbleupon.com/logout in the browser address

B. Log out of Stumble Upon in Chrome

1. If you have a blank tab, then click on the stumble logo button on the right top corner to load a page. Yes, it'll show you a page even if you want to log out!!

2. Then click on it again and it'll show you a drop down where you'll find the sign out button.It looks something like below.


3. Click on the damned thing and log out. Thats it...

I really really miss the old StumbleUpon interface and the logo.... :'(

Java : How To Read a Complete Text File into a String

One of the most overwhelming topics for any Java newbie is the File I/O and a simple reading of a file which seems so easy in C becomes cryptic with so many classes involved. I plan to document all those different ways to Read A Complete File into a String.

Java Code(s) for Reading An Entire Text File into a String


  1. Using the Scanner class.


    public class ReadEntireFileIntoAString {
     public static void main(String[] args) throws FileNotFoundException {
    
      String entireFileText = new Scanner(new File("readme.txt"))
        .useDelimiter("\\A").next();
    
      System.out.println(entireFileText);
     }
    }
    
  2. Using the BufferedReader to read line by line.

    But remember, we need to add a "\n" at the end, since readline strips the new line at the end
    public class ReadFileIntoAStringLineByLine {
    
     public static void main(String[] args) throws IOException {
    
      BufferedReader bufferedReader = new BufferedReader(new FileReader("readme.txt"));
    
      StringBuffer stringBuffer = new StringBuffer();
      String line = null;
    
      while((line =bufferedReader.readLine())!=null){
    
       stringBuffer.append(line).append("\n");
      }
      
      System.out.println(stringBuffer);
     }
    }
    
  3. Using the barebones  FileReader to read character by character using the read() method.

    We are avoiding an extra wrapper, the BufferedReader that offers us more tools, one of which we saw above. If you are using any other character set other than the default, use an InputSreamReader or a FileInputStream  to set the encoding.
    public class ReadEntireFileIntoAStringCharByChar {
    
     public static void main(String[] args) throws IOException {
      FileReader fileReader = new FileReader("readme.txt");
       
      String fileContents = "";
    
      int i ;
    
      while((i =  fileReader.read())!=-1){
       char ch = (char)i;
    
       fileContents = fileContents + ch; 
      }
    
      System.out.println(fileContents);
     }
    }
  4. The most Beautiful of them all! The Apache CommonsIO library's FileUtils class.

    However, the tradeoff is that you need to download the library and add it to your classpath. It also has overloaded versions of the readFileToString method with the charset encoding. Do check it out!
     import org.apache.commons.io.FileUtils;
     try {
        String str = FileUtils.readFileToString(new File("test.txt"));
        System.out.println(str);
      } catch (IOException e) {
         e.printStackTrace();
     }
    
Any more?? Please tell me, I'll add it to the list above and into my brain. Thanks for reading!!

How To : Show Only Titles In Archive Pages and Label Pages in Blogger

This is one great hack that'll let you show only blog titles when you see open a link that displays all posts under one label. You can click on Blogging How Tos in the top menu of my blog. It actually points to a link that displays all posts under the label blogging.

This will help the visitor to have a glance of what different posts are there in that category . Lets see how to do that in step by step.

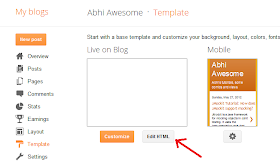
Step 1. Go to Templates -->Edit HTML


Step 2. Click on Proceed


Step 3. Then click on the  Expand Widget Templates check box. Make sure its checked. Find the following code....


<b:include data='post' name='post'/>

Step 4. Replace the above code with the following....


<b:if cond='data:blog.homepageUrl!= data:blog.url'>
             <b:if cond='data:blog.pageType != "item"'>
              <h3 class='post-title'><a expr:href='data:post.url'><data:post.title/></a></h3>
                <b:else/>
                   <b:include data='post' name='post'/>
                </b:if>
            <b:else/>
           <b:include data='post' name='post'/>
           </b:if>

Done! Now click on any label and you'll be seeing only titles of your blogs.


Thanks to Simple Blogger Tips for showing me this.

Sunday, May 27, 2012

How to : Remove "Showing posts with label.." message in Bloggger without deleting code

I read a lot of posts on -How to remove "Showing posts with label..." message that appears in blogger when a users clicks on a label. All of them however, ask you remove a section of the code that  appears in "Edit HTML" in blogger dashboard.

I, personally wouldn't want to delete code and replace them with other code for 2 reasons :
  1. It can easily mess up the existing code and spoil the template.
  2. If you want to revert back to the original , you will have to struggle to remember the old code as well as the structure.
Instead in this blog , we will see how we can comment out the section we don't need. We will be adding HTML comments around the text we don't need. Don't worry! Nothing very technical - anything that appears between <!-- and --> is a HTML comment. Thats it!!!

  1. This is the annoying text we want to remove..


  2. Go to Templates -->Edit HTML

  3. Click on Proceed
  4. Then click on the  Expand Widget Templates check box. Make sure its checked. Find the following code....
    <b:includable id='status-message'>
    
      <b:if cond='data:navMessage'>
    
       <div class='status-msg-wrap'>
    
         <div class='status-msg-body'>
    
          <data:navMessage/> 
    
        </div> 
    
        <div class='status-msg-border'>
    
          <div class='status-msg-bg'>
    
            <div class='status-msg-hidden'><data:navMessage/></div>
    
          </div>
    
        </div>
    
      </div>
    
      <div style='clear: both;'/>
    
      </b:if>
    
    </b:includable>
    
  5. Comment out the lines 5 to 23 by enclosing them within <!-- and --> as shown below.
    <b:includable id='status-message'>
    
      <b:if cond='data:navMessage'>
    
      <!-- <div class='status-msg-wrap'>
    
         <div class='status-msg-body'>
    
          <data:navMessage/> 
    
        </div> 
    
        <div class='status-msg-border'>
    
          <div class='status-msg-bg'>
    
            <div class='status-msg-hidden'><data:navMessage/></div>
    
          </div>
    
        </div>
    
      </div>-->
    
      <div style='clear: both;'/>
    
      </b:if>
    
    </b:includable>
    
  6. Done! Save Template and now check your blog by clicking on a label.

Hope you found it useful. Please comment! It will make my day!

JMockit Tutorial: How does JMockit support mocking?

JMockit is a java framework for mocking objects in JUnit testing. It uses the instrumentation apis that modify the bytecode during run time to dynamically create classes. The API model can be seen here.

The following are short descriptions about the most used tools offered by JMockit:
  1. JMockit Expectations: This class is the most used for a mocking the results of a  method by specifying what is expected when a particular method is invoked. JMockit names the setting of expectations as record phase and when the actual call to the method happens, its called the replay phase. Thus the jargon record-replay model. The object/class whose method is going to be mocked should be annotated using the @Mocked annotation in the class scope or should be  declared locally  in the expectations block.
    The following example will make all the mumbo jumbo above clear.
    /************* "Person.java" *********/
    public class Person {
    
     String name = "Abhi" ;
    
     public String getName() {
      return name;
     }
    
     public void setName(String name) {
      this.name = name;
     }
    
    }
    /************* "Department.java" *********/
    public class Department{
     Person person = new Person();//Person is the 'collaborator'- a fancy name for third party object
     
     public String getPersonName(){
      return person.getName();
     }
    }
    
    /************* "DepartmentTest.java" *********/
    public class DepartmentTest{
     @Mocked
     Person person;//The mocked object.Note that I am NOT using new to create an instance.
     
    
     @Test
     public void testGetName(){
      Department  dept = new Department();
      new Expectations(){
       //locally defined objects are automatically considered mocked
       {
        person.getName();//Setting the expected behaviour here. 
        returns("Nandan");//Will return Nandan instead of Abhi
       }
      };
      
      String name = dept.getPersonName();
      assertEquals("Name Should be Nandan","Nandan",name);
      
     }
    }
    

    The code is pretty self explanatory, I am mocking the getName() method to return "Nandan" which may take up various forms when you are writing the unit tests.
    Before we jump onto Verifications, Expectations block is a strict checking mechanism-the test run will fail if 
    • The calls in the expectation block are not replayed.
    • There is more than one call of the same method
    • There is a call for another method
    All this can be overcome by using the NonStrictExpectation class.Go through this link for an in depth understanding of the Expectations class.
  2. JMockit Verifications:  As the name suggests this class is used to *verify* something after a test method call has taken place. Extending the record-replay model, it becomes record-replay-verify model. Verifications can be used to explicitly check if a call has been made and how many times.Now onto the code....
    /************* "Person.java" *********/
    public class Person {
    
     String name = "Abhi" ;
    
     public String getName() {
      return name;
     }
    
     public void setName(String name) {
      this.name = name;
     }
    
    }
    /************* "Department.java" *********/
    public class Department{
     Person person = new Person();//Person is the 'collaborator'- a fancy name for third party object
     
     public String getPersonName(){
      return person.getName();
     }
    }
    
    /************* "DepartmentTest.java" *********/
    public class DepartmentTest{
     @Mocked
     Person person;//The mocked object.Note that I am NOT using new to create an instance.
     
    
     @Test
     public void testGetNameCalls(){
      Department dept  = new Department();
      String name = dept.getPersonName();
      new Verifications(){
       {
        person.getName();//verify that this method is called when dept.getPersonName() is invoked
       }
      };
     }
    }
    
    We can also specify the constraints for the number of times a method has to be called. Go through this link to understand how times,minTimes, and maxTimes fields can be used.
  3. JMockit Inline MockUps : This is my personal favourite. And I would say its the most powerful feature of JMockit to redefine methods/static blocks/constructors. I will be posting how to do all of that in the coming blogs. As of now, we'll see how to create a inline mockup that redefines a method for our test case.See the JMockit documention of MockUp for more information.
    /************* "Person.java" *********/
    public class Person {
    
     String name = "Abhi" ;
    
     public String getName() {
      return name;
     }
    
     public void setName(String name) {
      this.name = name;
     }
    
    }
    /************* "Department.java" *********/
    public class Department{
     Person person = new Person();//Person is the 'collaborator'- a fancy name for third party object
     
     public String getPersonName(){
      return person.getName();
     }
    }
    
    /************* "DepartmentTest.java" *********/
    public class DepartmentTest {
     @Test
     public void testGetNameCalls(){
      Department dept  = new Department();
      
      new MockUp(){
       @Mock //A directive to JMockit to redefine the method. Remember!! 
       public String getPersonName(){
        return null;
       }
          
      };
      String name = dept.getPersonName();//this call returns a null because of redefinition
      assertNull(name);
     }
    }
    
There are some more cool features of JMockit like Deencapsulation, "any" fields, Cascading mocks.... Will be writing about all this soon. Thanks for reading! Please comment!

How to format source code for blogger with SyntaxHighlighter by Alex Gorbatchev

Why Should one format code on their blogs?

Your code in the blog can go from loking like this.....
 public class Test {

    /** Prints "Hello World!" onto the consle */
    public static void main(String[] args) {
      
        String helloWorld = "Hello World!";
      
        System.out.println(helloWorld);
    }

}
TO This.....
public class Test {

 /** Prints "Hello World!" onto the consle */
 public static void main(String[] args) {
  
  String helloWorld = "Hello World!";
  
  System.out.println(helloWorld);
 }

}

Ain't that a looker!!!
All credit goes to Alex Gorbatchev who created the CSS styles for us to use.This is the best formatter out there!
Lets go step by step into integrating this into our blog in blogger:

1. Click on the Edit HTML  in the Templates section of the dashboard

2. Click on Proceed.

3. Search for </head> tag.


 4. Copy and paste the following text just above the tag


<link href='http://alexgorbatchev.com/pub/sh/current/styles/shCore.css' rel='stylesheet' type='text/css'/>
<link href='http://alexgorbatchev.com/pub/sh/current/styles/shThemeDefault.css' rel='stylesheet' type='text/css'/>
<script src='http://alexgorbatchev.com/pub/sh/current/scripts/shCore.js' type='text/javascript'/>
<script src='http://alexgorbatchev.com/pub/sh/current/scripts/shBrushCpp.js' type='text/javascript'/>
<script src='http://alexgorbatchev.com/pub/sh/current/scripts/shBrushCSharp.js' type='text/javascript'/>
<script src='http://alexgorbatchev.com/pub/sh/current/scripts/shBrushCss.js' type='text/javascript'/>
<script src='http://alexgorbatchev.com/pub/sh/current/scripts/shBrushJava.js' type='text/javascript'/>
<script src='http://alexgorbatchev.com/pub/sh/current/scripts/shBrushJScript.js' type='text/javascript'/>
<script src='http://alexgorbatchev.com/pub/sh/current/scripts/shBrushPhp.js' type='text/javascript'/>
<script src='http://alexgorbatchev.com/pub/sh/current/scripts/shBrushPython.js' type='text/javascript'/>
<script src='http://alexgorbatchev.com/pub/sh/current/scripts/shBrushRuby.js' type='text/javascript'/>
<script src='http://alexgorbatchev.com/pub/sh/current/scripts/shBrushSql.js' type='text/javascript'/>
<script src='http://alexgorbatchev.com/pub/sh/current/scripts/shBrushVb.js' type='text/javascript'/>
<script src='http://alexgorbatchev.com/pub/sh/current/scripts/shBrushXml.js' type='text/javascript'/>
<script src='http://alexgorbatchev.com/pub/sh/current/scripts/shBrushPerl.js' type='text/javascript'/>
<script language='javascript'>
SyntaxHighlighter.config.bloggerMode = true;
SyntaxHighlighter.config.clipboardSwf = 'http://alexgorbatchev.com/pub/sh/current/scripts/clipboard.swf';
SyntaxHighlighter.all();
</script>

5.  Click on Preview to check that your blog is not screwed up and save the template.


6. Using the CSS to format your code: 

The code that needs to be formatted must be enclosed within the <pre> tag. If you are formatting java code then :
<pre class="brush:java">
  Awesome java code goes here....
</pre>
Similarly styles for css --> "brush:css", for php --> "brush:php", for html --> "brush:html".
There's one catch though, when you are using "brush:html" blogger might show an error that there's an error with the HTML.In that case go use HTML Escape Tool to convert your HTML code into an escaped format and use this escaped format in between the <pre> tags.
Hope you liked my article. If you did, some comments below will make my day!

Saturday, May 26, 2012

JMockit Tutorial: How to add JMockit to an eclipse project?

Download JMockit:

Get the latest release from here. At the time of writing this blog the latest version is jmockit-0.999.15.You must have a zip named  jmockit-0.999.15.zip. Prerequisites - JDK should be 1.6+  and Junit 4.5+ 

Extract JMockit into a folder:

Unzip the contents of the zip file into a folder, say C:\Documents\jmockit. The jmockit folder should look like this with all the jars of jmockit.

 Add jmockit.jar into project's library

Next step is pretty straight forward if you know how to add an external jar into eclipse. Right click on the project in Package Explorer --> Build Path --> Configure Build Path .See the screen shot below.


 Click on the Libraries tab --> Add External JARS. Browser the folder in which you have stored jmockit.jar and add it. It will be listed in the window opened.


And thats it! Now we can use the JMockit constructs into our project and start mocking objects.
But before you run a test that uses JMockit, we need to add the java agent to the test class we need to run. You can read about it here

JMockit Tutorial: How to run a test case with JMockit?

This tutorial assumes that the jmockit.jar is already in the projects build path. If you want to know how to do it.You can find it here

 Adding the java agent argument

Since JMockit uses instrumentation apis, we need to add the java agent in the VM argument.

Assume the jmockit.jar is present in the directory C:\jmockit\jmockit.jar and you will be running ViewTest class as a JUnit test.


Then  in the Run Configurations window add to VM arguments "-javaagent:C:\jmockit\jmockit.jar" as shown in the screen shot below.


Then click on Apply and then Run.

Hope this tutorial makes things easier for you .If you have any questions please post, I'll be happy to answer.

Friday, May 25, 2012

Some more eclipse shortcuts!

There are some more cool short cuts I wanted to share after my friend Nikhil asked me to post more.
So here it goes...

1. Ctrl+ Shift +L (List shortcuts) : This opens a small window on the right hand bottom corner which lists all the keyboard shortcuts in alphabetical order.

2. Alt + Left  (Previous file) : When you want to come back to the previous file you were editing Alt+Left  will take you there. Extremely helpful when you want to view some file and get back to editing or view the previous files you've visited. Similarly Alt + Right does the opposite.

3. Ctrl + H (Search) : Actually I think it should be named "POWER Search". Let's take an example to see it power. You know "name.label" occurs in a .properties file but there are 100s of them in the project. Simple... Press Ctrl+H, click on "File Search" tab, then in Containing Text  fill up "name.label", in File name patterns, fill up "*.properties", then click on Search and let it rip.....The search results tab will show all the .properties files that  contain the string.
   There is a much more powerful feature that I must tell you. Place the cursor on any method and press Ctrl+H, then check what's there in the search window. Done? It would have opened the Java Search tab and filled up the entire method signature in the text field. The other options in that tab pretty useful if you want to narrow down your search.

4. F2 (View Javadoc): If you have observed, when you hover the mouse pointer over a java element is displays its javadoc in a small popup, but vanishes when focus is removed. If you want to scroll down the entire list and take a look at the javadoc with your own sweet time, press F2. This comes extremely handy when you are using a java built in method whose behaviour is unclear.

5.  F11(Debug) : The name says it all.Instead of clicking the green bug on the top left, just press F11.

6. Ctrl + F11(Run) : Again the name explains itself. It runs the current file, if it doesn't know how to run it, it'll ask you how to run.

7. Ctrl + K (Find next): Want to check where the method , say , "getMeSomeDrinks" is called next in the current file? Select the text "getMeSomeDrinks" then press Ctrl+K.

8. Ctrl + Shift +K (Find Previous): Same use as before, but finds the previous occurrence in the editing text.


Also please go through, Top 10 Eclipse Shortcuts With Screen Shots!

Wednesday, May 23, 2012

What is Mocking in unit Testing?

Third Party Objects:

  • You have a class View that uses a third party class DBManager.
  • The View gets a name from DBManager, converts it into lower case and returns it. 
  • The DBManager contacts a Database and pulls the data for you.
  • But, you want to test View's functionality without being bothered about how DBManager actually gets those names.
 The code for above looks like this:

public class View {

 DBManager dbManager = new DBManager();
 public String processName(){
  
  String name = dbManager.getName();
  
  return  name.toLowerCase(); 
 }
}
How do we test now? When we test we do not want the DBManager to contact the DB and get it for us.Its waaaay too an overhead for us to create a DB just for testing.
If you have guessed it, its right! You need to mock getName of dbManger into returning a String (which you may want to return different values for different different test cases??) that we can assert is giving us a correct lowercase value.

So the JUnit test looks something like this:

public class ViewTest {

 @Test
 public void testProcessName(){
  /* Code to mock dbManager.getName 
   * to return "Anoop" goes here
   */
  
  View view= new View();
  String name = view.processName();// here internally dbmanager returns "Anoop" because its mocked
  
  assertEquals("The returned name should be anoop","anoop",name);
 }
 
}

So basically mocking is, as the name says, redefining the behaviour of an object or method to imitate or modify the original implementation to accomodate our test cases.

There are many mocking tools out there - JMockit, Mockito, EasyMock, PowerMock etc..

The two ways of mocking are either by the proxy apis or the instrumentation APIs. There's a lot we can talk about these two but that's for another post.

Sunday, May 20, 2012

How To: Rename a File in Linux on the Command Line

Suppose the spelling of mickey.txt has been mis-spelt as mick.txt , then renaming can be done by the "mv" command. The sample syntax and usage is as given below.

Syntax: mv <old_file_name> <new_file_name>
$ mv mick.txt mickey.txt


The "mv" command is also used to move files from one location to the other.


Saturday, May 19, 2012

How To: View the History of Commands Executed in Linux

You have executed a lot of commands on the command line and want to view that complicated command with a lot of options. The history command displays all the commands that you have executed in the past for the current session.

$ history


Since the list can grow beyond the screen size its better to pipe it with "less" to scroll through - history | less. The file .bash_history stores these commands


How To : See A Very Brief Description Of A Command in Linux

Want to see what the command ls does in a one liner? You can use whatis command to help you out.

$ whatis ls


How To: Locate The Path Of A Command File

The which command shows the path of the executable/command. This does not show the path of commands which are shell-built-in.
Suppose you want to find the directory where the ls command is present, then type

$ which ls


The following screenshot shows "which" in action.Notice that cd is a built in command.


How To: Create A Directory Or Folder in Linux On Command Line

Suppose you want to create the directory named Study, then we can use the mkdir command as follows..

$mkdir Study

The following screen shot shows the effect of mkdir command before and after the mkdir command is executed.In case you are wondering what the ls command stands for, its used for listing files and directories in the directory.


How To: Search Folders or Directories in Linux on Command Line

You know Holidays is a folder and is somewhere beneath your home directory.
You can use find command with '-type d' option to narrow it to only directories.(Use '-type f' for files)
$find -type d -name Holidays

How To: Search A File In Linux On Command Line

Suppose you are in the home directory and want to search the file bank_statements.txt then, on the command line type
$find -name bank_statements.txt

We can also use this to find folders and with regular expressions.

Friday, May 18, 2012

How To : Go to the first line in vi editor

Answer: gg

  • Useful when looking at a very large file like a log

How To : go to the last line in vi editor

Answer: Shift + g
  • Useful when looking at a very large file like a log. 

Friday, May 11, 2012

Rage Comic: Happy Mother's day !!


My first attempt at creating Rage comics..
Any Comments?

Tuesday, May 8, 2012

India : The Hollywood's Slum

Okay!!! The Hollywood is planning on a new blockbuster that is going to tear up the charts. They need a scene where the poor, hungry, disease stricken human population is being helped by a white guy with a heart large enough that can engulf the solar system! Which place shall we go?

Obviously! Indiaaaah!! With the success of Slumdog Millionare, our slums are in the  limelight.... How about Eat Pray Love where Julia Roberts comes to pray along with staring at the street urchins begging her for money. Or maybe even before, with City Of Joy? Yep! We indians have all the ingredients that make up for the ultimate recipe for a filthy SLUM!

Its a mixed bag of feelings when writing this article. I can't get completely angry with the blokes who made The Avengers where Dr. Bruce Banner is treating some old fella in a shamble. It speaks the truth where extreme wealth is in the hand of a few while leaving the others in dire poverty. I live in a land where bribe needs to be paid to the law keepers(our bloated men in khakis) to the telecom minister. What! There's even a website for this... Why ,even an event that wanted to showcase India as a country that can organize , the  Common Wealth Games -2010 was hit by a scam. At a time where North Karnataka is reeling under drought our leaders, go high in a resort.

Movies have the power of creating  stereotypes overnight. Hope the entertainers who read this blog make an effort to show the brighter shades of our country. We have got entrepreneurs who have created jobs, selfless individuals who have transformed lives.

Before signing off... Anyone wants to make a movie about the obese population in USA?

Saturday, May 5, 2012

How to remove the nav bar in the new blogger interface

  1. Go to blogger.com admin interface.
  2. Click on Template
  3. Click on Edit HTML
  4. Click on Proceed
  5. Find the spot just after the Template MetaData and just above the Variable Definitions comment. This is where you will add the CSS code. Make a local copy of the existing html code as backup in case you screw up!
  6. Copy the text below and paste it in the spot.
    #navbar-iframe{display:none !important}
  7. Now your template's HTML should look like this....
  8. Click on Save Template button and you are  done! Close the opened window and view your awesome blog.

Original source :http://www.youtube.com/watch?v=hCPaClUZRwI